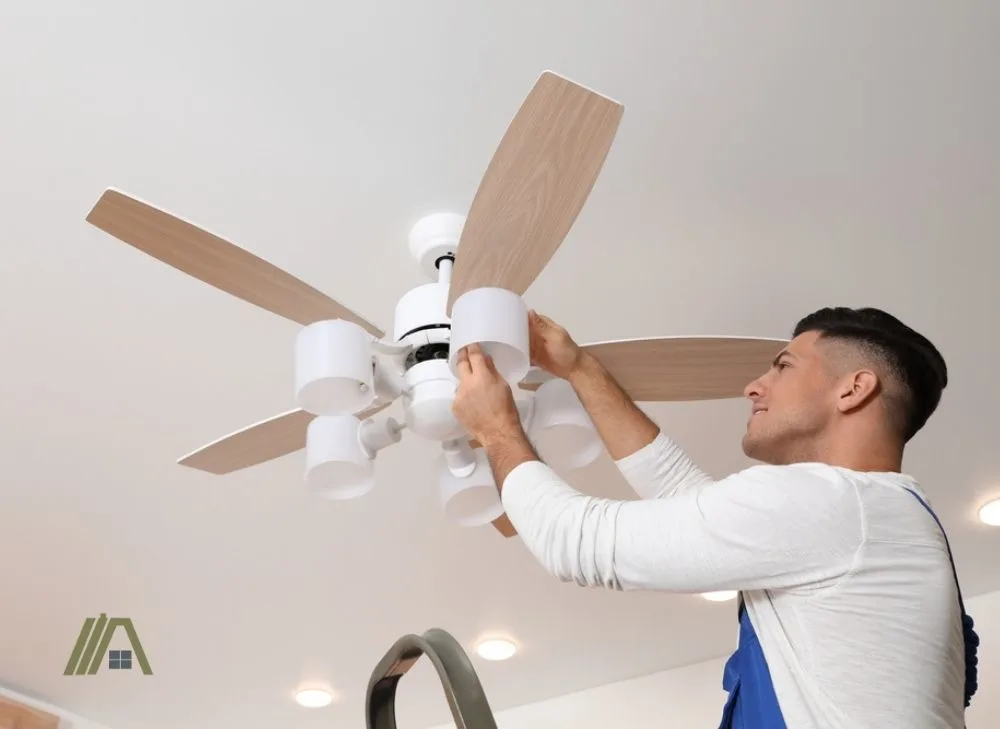
Remote Control Ceiling Fan Lite Non Working
Remote command ceiling fans with lights tin be incredibly useful as well as convenient. When your fan plant as well as the low-cal doesn’t, though, these fans tin can effort about frustration.
Below is a comprehensive direct that starts amongst easy fixes together with gets progressively more complicated. This is structured then that y'all can, for instance, avoid a complicated wiring project if the problem was but a burnt-out lite bulb.

Listed from easy to difficult to diagnose too ready:
- Check the light bulb together with replace if necessary.
- Check the calorie-free socket together with supersede if necessary.
- Check the remote batteries in addition to if it is synced amongst the receiver.
- Replace the remote/receiver gear up.
- Remove or supersede the wattage limiter.
- Locate too make unloose or broken wires.
Check the Light Bulb
One possible explanation for the ceiling fan calorie-free not working—even though the fan itself is working—is that in that location is a job amongst the light bulb.
Is It Burnt Out?
The easiest diagnosis would live that the bulb is burnt out.
For an incandescent bulb, yous tin can test if the bulb is burnt out by shaking it. If you lot hear a real sound, this means that the filament is broken. Because the filament is vital to the incandescent bulb’sec role, a broken filament means a bulb that has ceased to go.

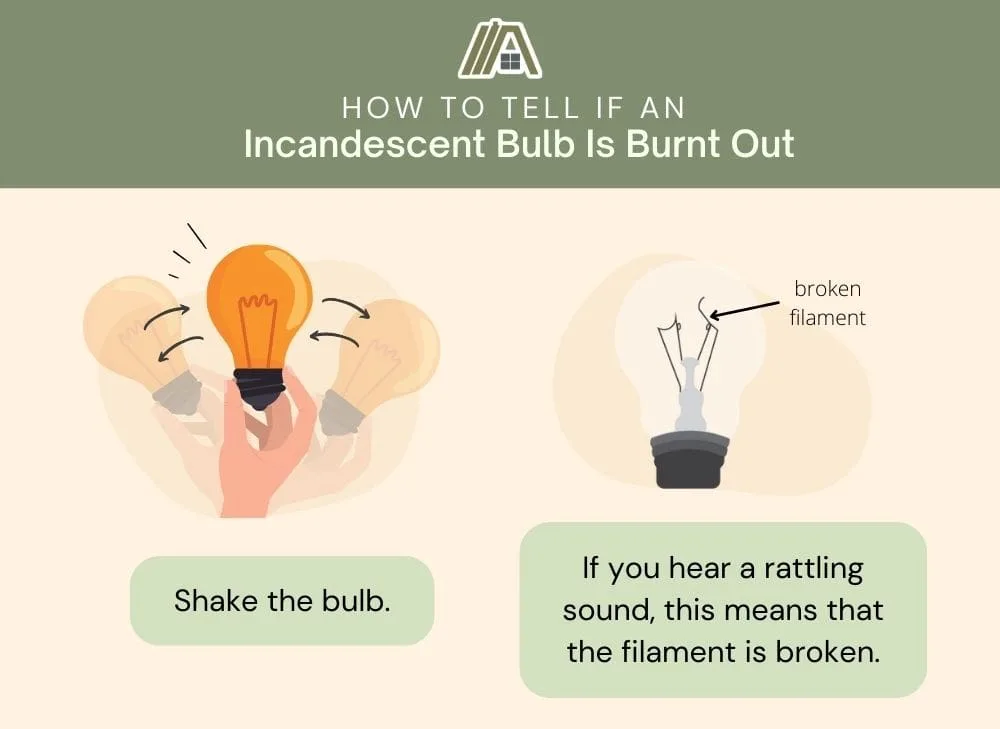
Surprisingly, the milk shake examination likewise works for LED bulbs fifty-fifty though they don’t have a filament.
A very audio inwards an LED bulb would point that an internal constituent of the bulb has broken free. Since these components are vital for a performance LED bulb, really volition ofttimes suggest a LED bulb that no longer plant.
If rattling doesn’t come about inward your LED bulb, the bulb may accept nonetheless burnt out. You tin test this past connecting it to some other socket too seeing if it all the same does non run.
Other Potential Issues
While tardily to diagnose, bulb burnout is not the only possible problem. Bulbs tin can be improperly sized, too powerful, or only more often than not faulty.
An sick-plumbing equipment bulb volition be hard to jibe inward the socket. Whoever installed this bulb would accept had a actually difficult fourth dimension doing and so. It is possible to succeed in some cases, although the bulb will not work well from the starting time.
A bulb of the incorrect size would not work good because it would non live connected to the socket properly to let for the needed electricity menses.
A bulb that exceeds the socket’second wattage boundary volition not burn or volition not burn down brightly because the ability furnish is likewise low. As the bulb tries to pull more power to office, it tin cause the socket to overheat, which is a fire take a chance.
Some bulbs are faulty from the get-get. Quality control is non perfect, and harm tin occur as the bulb is existence transported from its place of industry to the shop. Loose internal connections, missing internal connections, broken contact points, etc., are all possible general faults.
These bulbs may go initially as well as then terminate working, or they may not function at all.
Replacing the Light Bulb
Whatever the issue amongst your ceiling fan low-cal bulb, the solution is simple: supervene upon it.
If y'all are positive that the right bulb was used previously, and then you tin can match the replacement bulb to the old bulb inwards price of size as well as wattage.

On the other hand, if you lot are suspicious that the bulb was incorrectly sized or powered, yous tin bank check on the calorie-free socket for the maximum power, or you tin wait in the fan’s manual together with check the novel bulb to this data.
Remember, installation should live slowly; the correspond shouldn’t be also liberate or as well tight.
Ill-plumbing fixtures bulbs or bulbs that top the wattage limit are likewise both possible explanations for a ceiling fan lite beingness as well dim rather than non working at all.
Inspect the Socket
If the job is not a bad bulb, the adjacent step would live to check the socket.
Much like low-cal bulbs, lite sockets can burn down out or malfunction due to article of clothing in addition to tear or corrosion of the metallic.
The socket provides support too electric connections for the bulb, together with if it is non in working social club, the bulb volition not burn down. In around cases, it will calorie-free upwards just entirely intermittently.
How to Know the Socket Is Damaged?
Sometimes, when your lite stops working too you lot mean the bulb has blown, you will discover that this is non really the case. As presently as yous affect the bulb to take it out, it flickers on and so off once more. This is a sign that the result is actually alongside the socket, non the bulb.
A more definitive way that you tin can say that the problem lies inwards the socket too not somewhere else is if yous examination the socket alongside a multimeter, similar the AstroAI Multimeter (amazon link).

To examination the voltage:
- Select the air-conditioning setting on the multimeter.
- Insert the dark atomic number 82 into the mutual port and the cherry-red atomic number 82 into the mAVΩ port.
- Remove the low-cal bulb.
- Turn the device on.
- Either atomic number 82 tin be touched to the metal socket casing, in addition to the other atomic number 82 should impact the light bulb’s socket.
If the reading is about 120 V, your socket is doing fine. If the reading is around zip or far below 100 V, in that location is a job alongside your socket.
Fixing a Damaged Socket
If the multimeter reading is also depression in addition to the problem alongside the socket isn’t a quick make similar adjusting the socket’sec contact tab, the damaged socket must live replaced.
- Shut off the ability to the fan at the breaker box (this is really important as you lot will be disconnecting wires!).
- Remove the mounting screws together with gently draw the socket away, exposing the fixture wires in addition to their terminal screws.
- Disconnect these wires from their terminals together with take away the socket completely.
- Install the new socket together with attach the wires to the fixture wires.
- Secure the novel socket inwards home with the mounting screws.
Rather than replacing just the socket, the entire calorie-free fitting tin can as well be replaced. This should entirely live done if it is cheaper since lite kit installation is more than hard.
Make Sure the Remote Is Working Properly
If it seems that the calorie-free bulb components, including both the light bulb in addition to its socket inwards the ceiling fan, are working, then the next stride would live to check the remote.
The main issues that may hap include the remote as well as receiver being on different frequencies.
The mode that a remote control ceiling fan works involves a transmitter inward the remote as well as a receiver inwards the fan. These 2 devices communicate too turn a remote control into activity, like turning the lights on.
In gild for the ceiling fan’sec receiver to receive the remote’sec transmission, both must be prepare to the same frequency.
How to Check Whether the Remote Is Working?
Before assuming that the upshot is frequency-related, make sure that the remote is inwards range of the fan in addition to has charged batteries.


If you lot are sure the remote is charged together with inward reach, so the remote may be the result, too yous’ll want to check this.
To solve the frequency mismatch problem:
- Cut off the power to the ceiling fan.
- Use a screwdriver to detach the canopy from the mounting bracket, exposing the receiver.
- Locate the four sliders (DIP switches) on the receiver as well as banker's bill their configuration.
- Open up the back of the remote as well as locate its DIP switches (yous might have to take the batteries and lift a cover panel). Note the configuration.
- If the configurations don’t tally, so you lot can modify them then that they make. You can use a screwdriver or a pen to do this. It shouldn’t thing which one you modify to match the other.
- If the configurations make gibe, choose a new blueprint in addition to prepare both to this novel blueprint.
- Reattach everything, turn the ability dorsum on, together with bank check if the lights go straight off.
Regarding step five, it must be noted that the fact that the 2 DIP switch sets were configured in the same mode may mean that the remote is non the outcome.
But it’sec worthwhile trying to alter the blueprint to encounter if it solves the job because yous don’t want to act on to the more than complicated diagnoses too fixes unless y'all are absolutely certain the remote/receiver is not the result.
Resetting the DIP Switches Didn’t Work
If this procedure doesn’t appear to go, the remote command may accept to live replaced. Should replacement not work either, you lot accept ruled out the bulb, socket, in addition to remote, as well as y'all can act on to the side by side possibility.
Remotes non working tin can too issue inward the fan non turning off, then it is always a good place to outset if y'all are experiencing whatsoever other kinds of problem amongst your ceiling fan operation.
Test the Wattage Limiter
The next process is more than tricky but if the final few troubleshooting tests didn’t go, this i might run for y'all.
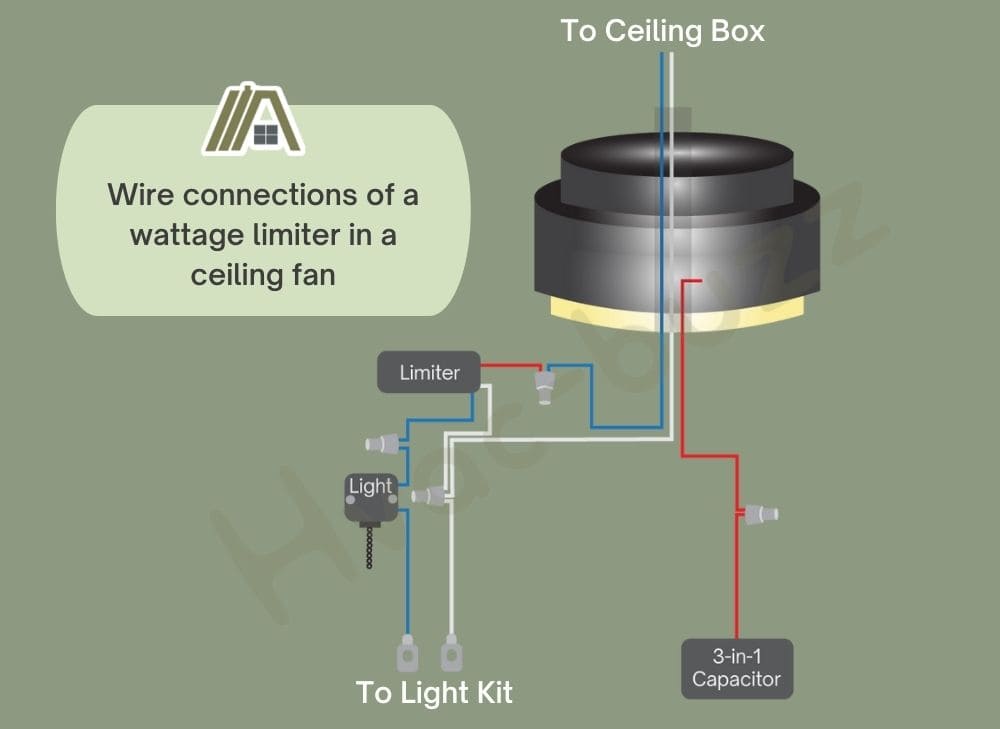
Ceiling fans manufactured later on 2004 frequently have something called a wattage limiter, which does exactly what it sound similar it does. It limits the sum of power the fan can function. If this power bound falls curt of what is required to spin the fan blades in addition to low-cal the bulbs, so y'all volition accept ceiling fan lights that don’t function, or don’t work properly.
One manner to identify if the wattage limiter is the problem is if your ceiling fan lights flash.
In this example, it is best to supervene upon or remove the limiter.
How to Test the Limiter?
To verify if the wattage limiter is the problem:
- Turn off the ability to your ceiling fan as well as take the fixture.
- Locate the wattage limiter (it is typically a minor dark box) together with delineate the wires that get from the lights to the limiter.
- Use a multimeter in addition to test the limiter. Disconnect the clip that connects the bulbs to the limiter too place the leads into each side of the clip. There would be a voltage reading on the multimeter.
- When y'all mensurate from the bottom of the limiter from the common to the hot, there should be no reading.
- This indicates that the wattage limiter is operational too may be your problem.
Replace or Remove the Limiter
Although it is mandatory for the manufacturers to include a wattage limiter, it is non mandatory for the owner to continue them in. It is recommended to keep them inward, though, since they tin can lower free energy consumption in addition to removing them may increment the chance of burn down.
Try removing it to come across if it solves your problem. If non, yous tin can ever lay it dorsum inwards.

To remove the limiter:
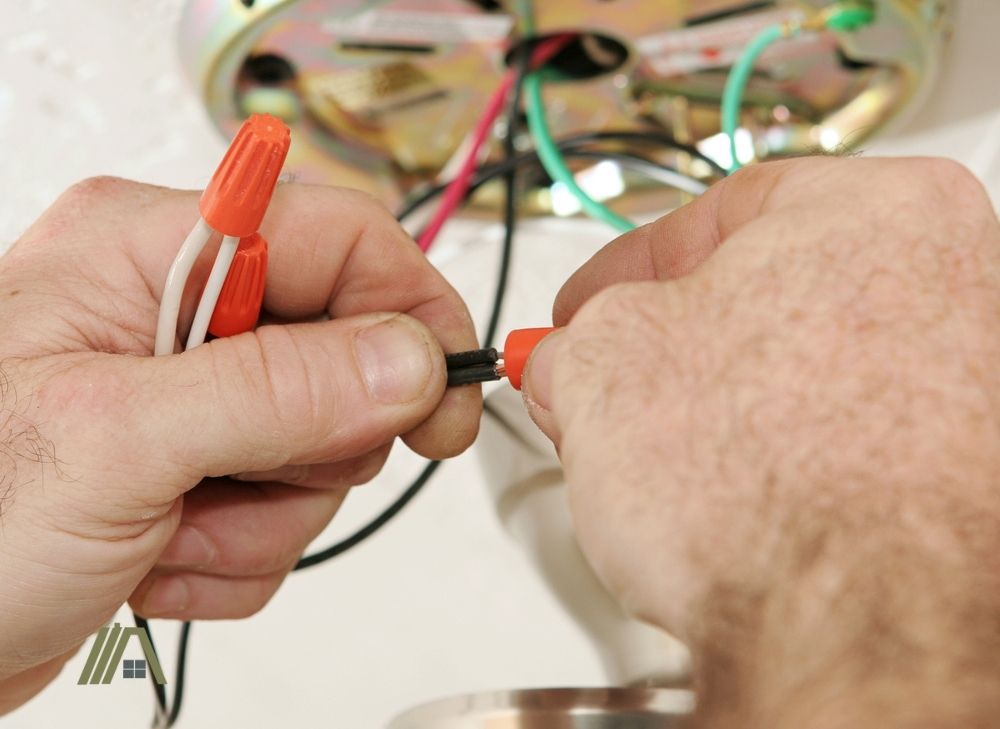
- Disconnect the common wire, which is unremarkably white.
- Disconnect the dark and ruddy wires connecting the limiter to the switch in addition to the lights.
- Cut the mutual wire alongside lineman’s pliers or some other wire-cutting tool, similar the DOWELL Lineman’sec Pliers (amazon link).
- Strip the mutual wire as well as and then connect to the loose black wire alongside a wire nut.

To replace the limiter with 1 that allows a slightly higher power utilisation, follow these same instructions merely do non consummate the concluding pace. Instead, install the novel limiter inward the same orientation every bit the sometime limiter.
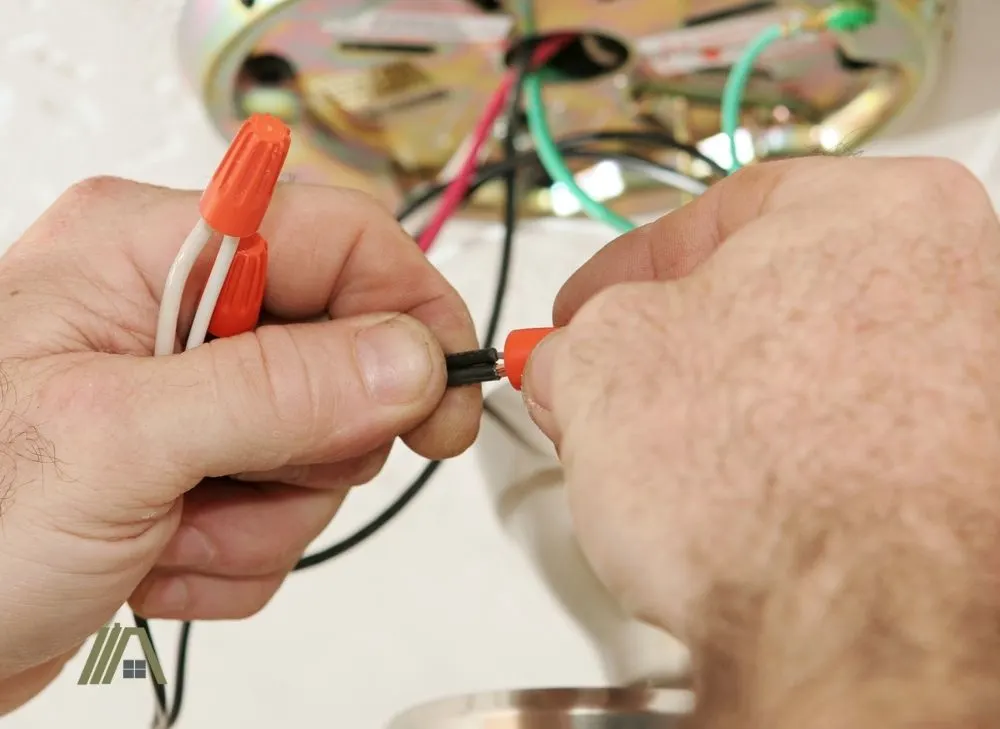
Look for Loose/Broken Wire Connections in Light Kit
Unfortunately, if all of the troubleshooting steps in a higher place don’t work, the job is likely to be wiring-related.
This tin can be the nigh complicated pace since the procedure of looking for loose or broken wires tin can demand long periods of searching.
Faulty wiring would terminate electricity flow into the ceiling fan low-cal if the calorie-free wiring was impacted in addition to not the fan wiring. This would explain why the fan industrial plant but the lights make non.
How to Check the Connections?
Before anything else, it is imperative that the ability is shut off to the ceiling fan.
To narrow downwards your search, it is wise to wait for wires inwards betwixt the lights together with the ability rootage. Wires that power the fan are non part of the problem since the fan yet works, and so eliminating them will relieve you fourth dimension.
The next footstep together with the bulk of your fourth dimension spent on this task volition be to investigate the wires in query. Loose wires volition hopefully live obvious merely or so probing may be required to cheque how liberate they are.
External harm is obvious simply internal impairment would require a more than thorough examination, using a multimeter as described in the following video:
Fixing Loose Wire Connections
Once the job wire has been identified, all that is left to make is to tighten the connectedness.
This ordinarily involves tightening a wire nut which tin be done amongst your hands. Using a tool may impairment the wires.
Fixing Damaged Wiring
You will take to supercede the piece of damaged wire. You tin can verbalize to mortal at your local hardware shop every bit to what wire is best for use in a ceiling fan calorie-free fixture in addition to then buy a length of this. Cut it to size at dwelling house, strip it at the two ends, and attach it alongside wire nuts to whatever the previous wire was attached to.
Sources
https://en.wikipedia.org/wiki/Lightbulb_socket
https://www.hunker.com/13414356/how-to-use-a-multimeter-to-examination-calorie-free-fixtures
https://www.hunker.com/12270719/how-to-supercede-a-ceiling-fan-calorie-free-socket
https://upgradedhome.com/is-it-prophylactic-to-remove-wattage-limiter-in-ceiling-fans/


Comments
Post a Comment